MJL Posted July 1, 2011 Share Posted July 1, 2011 I have made a new character. As you can see he is fairly simple, having no legs. I know that there are a number of rigs available complete with installers, but I thought that this might a golden opportunity to learn in more depth, step by step and rig this little guy from scratch. I have made the necessary bones and assigned the cp's. What would be the next step? CP weighting? And what about IK and FK and that Chain Thing?. Quote Link to comment Share on other sites More sharing options...
*A:M User* Shelton Posted July 1, 2011 *A:M User* Share Posted July 1, 2011 Nice character Myron Quote Link to comment Share on other sites More sharing options...
itsjustme Posted July 1, 2011 Share Posted July 1, 2011 I'll second that, cool character, Myron! I think the best thing would be to watch Holmes' "Building Your First Rig" tutorial...Part 1 and Part 2. As for what you have so far (that I can see), I would avoid using "R" or "L" instead of "right" or "left" because it might cause problems with the "MirrorBone" plugin. Quote Link to comment Share on other sites More sharing options...
Paul Forwood Posted July 1, 2011 Share Posted July 1, 2011 That is a terrific character, Myron! The next step would be a simple control rig. I'm not the best of riggers so perhaps Mtpeak2 or it'sjustme will offer some good advice that will get you what you want quicker.My rigging suffers in the IK/FK switching area. (Edit: I see that David has already offered some advice). Once you have your rig working create a test Action which puts your character through all of it's extreme poses an this will show up all of the weighting and bone assignment faults. Switch to muscle mode and adjust the weighting where needed. A simple control rig might consist of an abdomen, thorax, head and IK hand targets. Quote Link to comment Share on other sites More sharing options...
largento Posted July 1, 2011 Share Posted July 1, 2011 Very cool character, Myron! When it comes to doing the CP weighting, I made a comic-book style tutorial about doing it years ago that you can see here. It's *very* basic, but might be helpful. Quote Link to comment Share on other sites More sharing options...
Hash Fellow robcat2075 Posted July 1, 2011 Hash Fellow Share Posted July 1, 2011 Good looking character! there's lots of good advice above. What would be the next step? CP weighting? yeah, before you "rig" it further go through and bend each bone and see if you like the way the body part is bending. If not, then you need to investigate CP weighting or fan boning. And what about IK and FK and that Chain Thing?. Chain? Quote Link to comment Share on other sites More sharing options...
John Bigboote Posted July 1, 2011 Share Posted July 1, 2011 Why does his head remind me of 'Spy vs. Spy'...? Yeah, Holmes's Simple Rig and tutorials will help you out. I find that CP weighting is an endless process... I am forever changing weights around, maybe I'm just not that good at it. Quote Link to comment Share on other sites More sharing options...
Paul Forwood Posted July 1, 2011 Share Posted July 1, 2011 You could apply dynamic constraints to the tips of those antennae. That would make the chain of bones in each a dynamic chain. Quote Link to comment Share on other sites More sharing options...
johnl3d Posted July 1, 2011 Share Posted July 1, 2011 Nice Bee agree with Matt spy vs spy look Quote Link to comment Share on other sites More sharing options...
MJL Posted July 1, 2011 Author Share Posted July 1, 2011 Thanks Guys. Thank You for all the help. Good suggestions, all. I will experiment with the cp weighting, the dynamic chain, and of course watch the always brilliant video tutorials done by MR. Holmes Bryant. Will keep you "posted". I'm helping Gene in another video for my friend, Franco Paletta, to follow up the "Baby Won't Let Me Ride" video. Here is a shot of the Logo and slogan. Thought the bee could "Be" an interesting addition to the project, or even try for a short animation of the logo itself. Can't help the Spy Vs. Spy thing. In the immortal words of Jessica Rabbit: "I can't help the way I am, I'm just drawn that way." or something like that. Quote Link to comment Share on other sites More sharing options...
mtpeak2 Posted July 1, 2011 Share Posted July 1, 2011 This model should be fairly easy to rig. I would change up the hierarchy and bone position a bit though. I would create a null to act as a whole body bone (root bone, placed at the base of the lower body and the mid spine bones). I would place the lower body bone and stinger bones as children of the null (all stinger bones attached to parent). Then change direction of the mid spine bone and the chest bone (chest bone not attached to parent (mid spine)). Shoulders children of the chest bone. Arm bones can be a chain of bones, starting with the shoulder to the hands. Biceps not attached to parent (shoulders) and hands not attached to parent (forearms). Then in an ON/OFF pose setup an "euler limit" constraint on the forearms to limit the rotation to one axis (Y or X, depending on the direction you set in bones mode). You can get a little fancy by duplicating the chest bone (child of null). Then set an "aim at" constraint on the mid spine bone to the dup chest bone (controller) and a roll like 50% and have the chest bone orient like the controller. If you have a neck bone with the head as a child, you can do the same by duplicating the head bone and using it as a controller (using the same constraints as the spine setup). Cool model, BTW. Quote Link to comment Share on other sites More sharing options...
MJL Posted July 2, 2011 Author Share Posted July 2, 2011 robcat yeah, before you "rig" it further go through and bend each bone and see if you like the way the body part is bending. If not, then you need to investigate CP weighting or fan boning. I've been experimenting with CP weighting and it seems to going well. itsjustme As for what you have so far (that I can see), I would avoid using "R" or "L" instead of "right" or "left" because it might cause problems with the "MirrorBone" plugin. I'm not planning on using the mirror bones plugin, but just in case I changed the "L" & "R" to "left" & "right" mtpeak2 I would create a null to act as a whole body bone (root bone, placed at the base of the lower body and the mid spine bones). I would place the lower body bone and stinger bones as children of the null (all stinger bones attached to parent). Then change direction of the mid spine bone and the chest bone (chest bone not attached to parent (mid spine)). Shoulders children of the chest bone. Arm bones can be a chain of bones, starting with the shoulder to the hands. Biceps not attached Mark, assuming that what you meant by "whole body bone", the mid spine bone is then a child of the null as well. I think I have accomplished this part. I'm not quite sure I understand the next part, Then in an ON/OFF pose setup an "euler limit" constraint on the forearms to limit the rotation to one axis (Y or X, depending on the direction you set in bones mode). could you possibly give me a little more on that? Then I may be ready to get fancy. Paul, I like the idea of the dynamic constraints on the antenna, and wil implement that once I get there. (and study up a little) Thanks for all the help and encouragement, folks. I kinda like the little guy myself. Quote Link to comment Share on other sites More sharing options...
mtpeak2 Posted July 2, 2011 Share Posted July 2, 2011 Sorry Myron, yes, the mid spine bone is a child of the null as well. Ok, in bones mode make sure all the arm bones roll handles are facing the back of the model (top view) 90' Z rotation for the right arm and -90' Z rotation for the left. Then right click in a blank space in the window a choose New>Pose>On/Off. In the relationship window (temp action) right click on the forearm bone and choose New Contraint>Euler Limit. In the constraint properties, set all the minimum to 0 and in the maximum, set only the Y and Z to 0. Close the temp action window. Now in the models user properties, set this pose to ON, save model. Now this pose will be automaticly ON when starting a new action or chor. This setup will give you FK arm setup. Quote Link to comment Share on other sites More sharing options...
MJL Posted July 3, 2011 Author Share Posted July 3, 2011 Thank you very much Mark, I think I have it done. do I just name that pose "Euler Limits" and ignore it in the user properties? I also think that that is as fancy as I'm gonna get for now. I may revisit rigging this guy at a later point and give him an upgrade, but he's good for now. Spent a couple of hours weighting cp's. gonna make some fist clenching poses and a "Smooch" and "play harmonica" pose and he'll be ready to roll. PS. oh yeah, and a stinging pose? Quote Link to comment Share on other sites More sharing options...
mtpeak2 Posted July 3, 2011 Share Posted July 3, 2011 I would just name it constraints. Turn the pose ON in the models user properties, not the pose slider window (save the model with it ON). Then you can ignore it when in an action or chor. Quote Link to comment Share on other sites More sharing options...
MJL Posted July 3, 2011 Author Share Posted July 3, 2011 If I should move this to WIP someone let me know. While the rig is far from perfect, at this point it is, functional enough. I've been trying to work with poses (percentage). I got right and left hand clench poses. Trying to make a Taking Off pose that includes both hands clenched, but something isn't jiving correctly. When I start the taking off pose, the two clench poses are at 0%. then at Taking Off>100% I set both clench poses to 100% also. But then the percentages in the pose slider window go screwy (-110% -300% ). Any body have some insight? Quote Link to comment Share on other sites More sharing options...
itsjustme Posted July 3, 2011 Share Posted July 3, 2011 When I start the taking off pose, the two clench poses are at 0%. then at Taking Off>100% I set both clench poses to 100% also. But then the percentages in the pose slider window go screwy (-110% -300% ). Any body have some insight? I'm thinking you have the clench Poses being adjusted in more than one Pose and didn't realize it, Myron. Quote Link to comment Share on other sites More sharing options...
MJL Posted July 3, 2011 Author Share Posted July 3, 2011 You are most likely right, David, but how do I avoid that? Do I reclench the hands, by hand in the take off pose? How would I use the clench hand pose in the take off pose otherwise? Quote Link to comment Share on other sites More sharing options...
itsjustme Posted July 3, 2011 Share Posted July 3, 2011 You are most likely right, David, but how do I avoid that? Do I reclench the hands, by hand in the take off pose? How would I use the clench hand pose in the take off pose otherwise? It looks like you have used the hand clench Poses and the take off Pose, so, that would use the hand clench Poses twice...you also have the beginnings of an Expression in there which appears to be empty. I would just leave the hand clenching out of the take off Pose and clench them using the hand clench Poses as needed...less confusing. Hope that helps. Quote Link to comment Share on other sites More sharing options...
MJL Posted July 3, 2011 Author Share Posted July 3, 2011 Got it, David, thanks. Quote Link to comment Share on other sites More sharing options...
Paul Forwood Posted July 3, 2011 Share Posted July 3, 2011 Great progress, Myron! Quote Link to comment Share on other sites More sharing options...
MJL Posted July 4, 2011 Author Share Posted July 4, 2011 Thanks Paul, I actually feel like I'm beginning to connect some of the elusive dots. After making the euler constraints pose suggested by Mark. I made the wings, gave them bones and put Translate to and Orient like constraints to the chest bone and saved that pose. I now wish to put orient like and translate to constraints on the base antenna bones (to the head bone) and put a dynamic constraint on the ends of the antenna. Here is my question: Can I select the "edit relationship" option after right clicking on the "Wings Constraints" pose and add the antenna constraints to that pose? these are all on/off poses. EDIT: The answer to my question is: "YES I CAN" I AM finding that I am able to find my way around deeper layers of A:M. AND IT MAKES SENSE! Quote Link to comment Share on other sites More sharing options...
mtpeak2 Posted July 4, 2011 Share Posted July 4, 2011 You don't need the "translate to" and "orient like" constraints on the wings to the chest, just make them children of the chest bone (drag and drop them). Same goes for the antenna, just make them children of the head bone. Quote Link to comment Share on other sites More sharing options...
MJL Posted July 4, 2011 Author Share Posted July 4, 2011 HAPPY JULY 4TH EVERYBODY! thanks Mark! I did as you suggested. I applied a dynamic constraint to the last bone in each antenna. These are screen captures of the first four frames. I adjusted the stiffness to 95% and there was no difference. Obviously, it is more movement than I wanted. Quote Link to comment Share on other sites More sharing options...
Paul Forwood Posted July 4, 2011 Share Posted July 4, 2011 Go into the dynamics and set the angle limit to about 70. Quote Link to comment Share on other sites More sharing options...
mtpeak2 Posted July 4, 2011 Share Posted July 4, 2011 You may also want to set the 2nd bone in the chain to not attached to parent. This will keep the base of the antenna rigid. You be able to animate the base bone and have the rest animated through the dynamics. Quote Link to comment Share on other sites More sharing options...
MJL Posted July 4, 2011 Author Share Posted July 4, 2011 I have implemented both suggestions, but haven't tried them yet. Thank you. I made several pose sliders to assist with animating. and all but one of them work as expected, but the one of does not affect the model in the chor. the others do. When I select edit expression for that pose slider, the relationship window comes up and the slider works in that window. then I save the model, close the relationship window but it still doesn't work in the chor? EDIT: I solved the problem by saving and closing the project and restarting A:M. Quote Link to comment Share on other sites More sharing options...
MJL Posted July 5, 2011 Author Share Posted July 5, 2011 In the chor, when I hit play, the antenna moved, but not much. when I rendered it to movie form I don't see any dynamics at all. Maybe I need to back off on the stiffness now. but I do have four seconds of basic animation. xStinger.mov Quote Link to comment Share on other sites More sharing options...
itsjustme Posted July 5, 2011 Share Posted July 5, 2011 In the chor, when I hit play, the antenna moved, but not much. when I rendered it to movie form I don't see any dynamics at all. Maybe I need to back off on the stiffness now. but I do have four seconds of basic animation. Great stuff, Myron! Quote Link to comment Share on other sites More sharing options...
mtpeak2 Posted July 5, 2011 Share Posted July 5, 2011 Looking good Myron. Quote Link to comment Share on other sites More sharing options...
MJL Posted July 5, 2011 Author Share Posted July 5, 2011 Thank You Very Much! I backed off on the stiffness for the dynamics on the antenna and that is working well, it looks like. But before I re-rendered that little scene I wanted to add some wing flapping. I made a 1 second action. key framed to go from open to closed every 5 frames. I dropped it onto the bee in the chor. I set the repeat in the "shortcut to wing flapping" properties to 4. But it is not doing anything. If I open the edit window it works fine. but not in the chor. I closed and re-opened A:M but that didn't do the trick this time. I could key frame the wings separately through the 4 seconds, but I would rather make the action work properly. Any Suggestions? Quote Link to comment Share on other sites More sharing options...
mouseman Posted July 5, 2011 Share Posted July 5, 2011 It might help to post a screen dump of the PWS window with the actions on the timeline, as well as the properties of the action you've applied to the character. I'm enjoying watching your progress. Seeing you overcome these obstacles is quite heartening! Quote Link to comment Share on other sites More sharing options...
Paul Forwood Posted July 5, 2011 Share Posted July 5, 2011 A:M16 seems to have some problems updating so tap that spacebar after making any changes. I was modelling a dog the other day, and saving as I made changes, and then I did something unknown that caused it to crash. When I ran A:M again and loaded the project the dog model had reverted back to a very early state. I haven't got enough details to file a report but I'm keeping an eye on things and saving any changes to models as new versions. Myron, try baking the dynamics before rendering and see if the motion of the antennae comes through. It's looking excellent! Quote Link to comment Share on other sites More sharing options...
MJL Posted July 5, 2011 Author Share Posted July 5, 2011 thanks Paul, I am using version 15.0j. I down loaded some of the other upgrades but was having glitch difficulties., so I went back to this version and have just stayed. It might help to post a screen dump of the PWS window with the actions on the timeline, as well as the properties of the action you've applied to the character. Here are those screen grabs. EDIT: Here is the clip with motion in the background. You can see that the dynamics are working, but are too stiff. Still haven't got the wing flapping action working yet. zStinger.mov Quote Link to comment Share on other sites More sharing options...
Gerry Posted July 5, 2011 Share Posted July 5, 2011 Nice test, Myron! I worked on getting some similar wings "buzzing" about a year ago and posted some progress reports, somewhere in my "Nightcallers" forum. If you plan on animating the wings I'll post a link for you if you like. EDIT: here's a link to my solution: blurry insect wingbeat Quote Link to comment Share on other sites More sharing options...
MJL Posted July 6, 2011 Author Share Posted July 6, 2011 Just to finish this off, I finally got the action to work by adjusting the settings. Not completely sure what I did, but its working. But now that it is, I'm not happy with the wings themselves. Gene offered to pull the wings off his fly and let me use them. I may take him up on that. When I do, Gerry, I may try your suggestion, your wing action looks great! Flapping_Stinger.mov Quote Link to comment Share on other sites More sharing options...
NancyGormezano Posted July 6, 2011 Share Posted July 6, 2011 terrific bee! terrific background! Quote Link to comment Share on other sites More sharing options...
TheSpleen Posted July 6, 2011 Share Posted July 6, 2011 great stuff! Quote Link to comment Share on other sites More sharing options...
MJL Posted July 6, 2011 Author Share Posted July 6, 2011 Thanks Nancy and Gene, I took my idea for the background from the early Hollywood days. I made a cylinder, put a jpg on it and rotated it during the chor. LOL the bee never really moves. Quote Link to comment Share on other sites More sharing options...
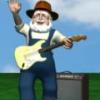
MJL Posted July 11, 2011 Author Share Posted July 11, 2011 I'm working on an animated Logo for my Friend Franco Paletta and his band The Stingers. Gotta get the 3d letters finished then I'll try some animation. Quote Link to comment Share on other sites More sharing options...
Hash Fellow robcat2075 Posted July 11, 2011 Hash Fellow Share Posted July 11, 2011 I like that! Good looking pose! Quote Link to comment Share on other sites More sharing options...
HomeSlice Posted July 11, 2011 Share Posted July 11, 2011 That's looking really good Myron. Quote Link to comment Share on other sites More sharing options...
MJL Posted July 11, 2011 Author Share Posted July 11, 2011 Thanks a lot guys. that means a lot. I'm trying to use only surface attributes on this project, just to cut down on render times, when I get to the actual video. Here is the latest shot. He's now holding the harmonica. all I have left is the old style microphone that Gene uses in the videos, and the rest of the lettering, then I will start to animate the l.ogo Quote Link to comment Share on other sites More sharing options...
Hash Fellow robcat2075 Posted July 12, 2011 Hash Fellow Share Posted July 12, 2011 Looking at that pose some more... there's probably a way to pose his left arm so it doesn't look like it's coming out of his beak, and still keep the same general intention. Quote Link to comment Share on other sites More sharing options...
Hash Fellow robcat2075 Posted July 12, 2011 Hash Fellow Share Posted July 12, 2011 Something like this... If the arm is really attached too high to clear the mouth from this angle, I'd consider detaching it and cheating it for this shot. Quote Link to comment Share on other sites More sharing options...
MJL Posted July 12, 2011 Author Share Posted July 12, 2011 Good idea, Robert, but at this point, it it a MOOT point. Evidently Georgia Tech likes that bee as well. *%$#@ I had no idea. Still, all in all, it was a great exercise and I learned a lot. I may try to modify the head shape and change things enough to avoid copyright infringement. I will probably finish the animated logo the way I intended, just as proof of concept. Quote Link to comment Share on other sites More sharing options...
Hash Fellow robcat2075 Posted July 12, 2011 Hash Fellow Share Posted July 12, 2011 Darn! Quote Link to comment Share on other sites More sharing options...
MJL Posted July 12, 2011 Author Share Posted July 12, 2011 I actually like my first attempt at modifying the bee. I will spend some time tweaking a bit, but I'm pretty sure that this guy is different enough that there should be no complaint. Is this pose more like what you had in mind, Robert? Quote Link to comment Share on other sites More sharing options...
Paul Forwood Posted July 12, 2011 Share Posted July 12, 2011 If you are worried about this character being too similar to the GT bee maybe you could try some simple changes like this: Small changes to his sunglasses and the possible addition of a hat would also help differentiate between the two bees. Nice work, whatever, Myron. ------ Edit: Excuse the poor editing, I used the Gimp and mouse, but here are a couple more attempts: Changing the shape of his snout might help also: Adding a wastecoat/vest: Quote Link to comment Share on other sites More sharing options...
MJL Posted July 15, 2011 Author Share Posted July 15, 2011 A lot of good ideas, Paul. In the end I decided to concentrate on re-shaping the snout. That was the most distinguishing feature. I added a pair of sunglasses. I think that's just enough to do the trick. Now back to studying CP weighting and smartskin. Oh yeah, we'll see if my friend likes the blue. I think I do. Quote Link to comment Share on other sites More sharing options...
Recommended Posts
Join the conversation
You are posting as a guest. If you have an account, sign in now to post with your account.
Note: Your post will require moderator approval before it will be visible.