dinocarl
-
Posts
78 -
Joined
-
Last visited
dinocarl's Achievements
Apprentice (3/10)
0
Reputation
-
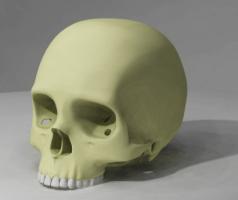
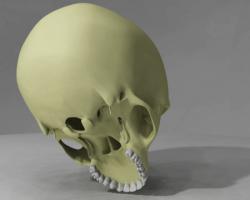
John, enamel is what makes teeth white, though perhaps this model's teeth texture could use a scuffing up. Thanks, Nancy and Robert!
-
Happy Halloween, everybody! Carl
-
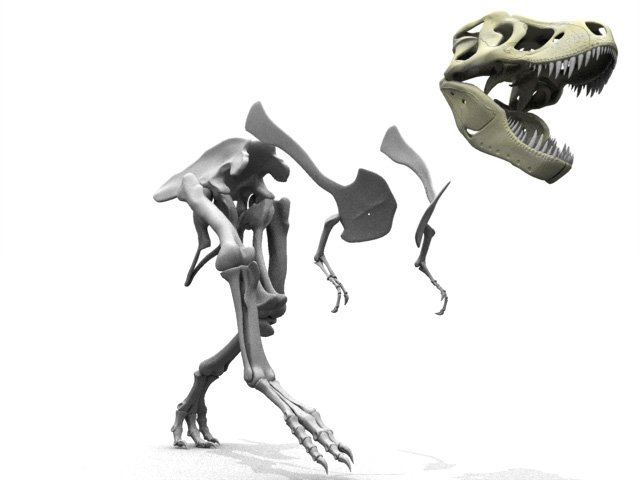
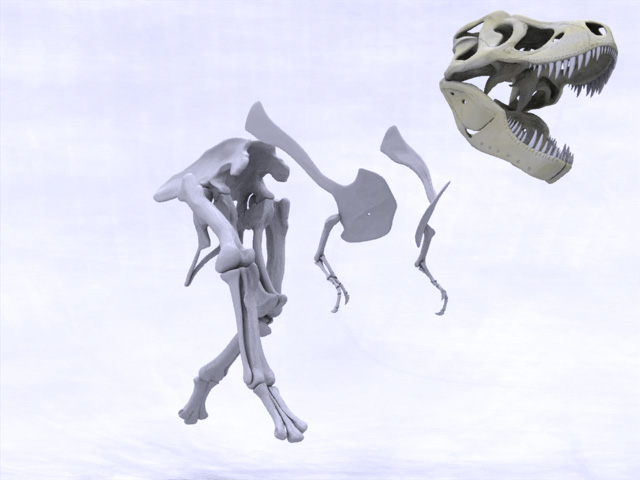
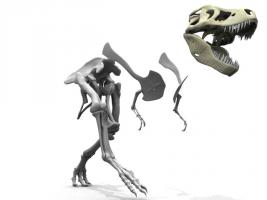
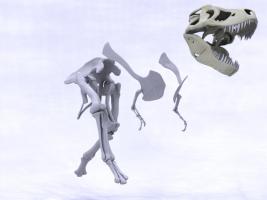
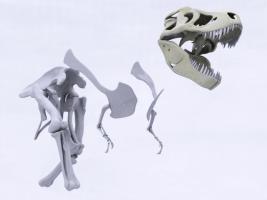
For this update, I've added the 3 main toes; hopefully I can get to the 2 vestigial toes this weekend. The model now stands at just under 16,000 patches. BTW Rodney, I am trying to be economical while remaining true to the overall shapes. Of course, the problem with almost every bone is that the great number of protrusions, dents and holes in/on them really get the patch ticker going. And I just did a rough estimate of what the vertebrae are going to entail, and they will likely run me another 30,000 all by themselves. I haven't rigged the legs or feet yet, either, and that's high on my to do list; for this render, I just positioned everything manually. At any rate, it'll function as another procrastination strategy until I can no longer put off making those vertebrae. robcat, after all that talk of not caring about render times, I've gone ahead and used AO for this render with 2 more lights thrown in for good measure. My radiosity set-up was washing out a lot of the detail (especially in the feet), so I switched, at least for this update. As predicted, my render time savings were about half. Carl
-
Sorry for the delay in getting out an update. Holidays, job-hunting, head colds all played a part in prohibiting further work. For this installment, all I've done is add the top metatarsals. It's not much, and I'm terribly excited about moving on to the toes, but these were definitely tricky to model. Here's the update: BTW, robcat, I meant to say it in my last post - you're right, an AO render would reduce render time and look largely similar. However, I do prefer the radiosity render and, given that I have two machines in my render farm, it's not a problem for me to send something off to them while I keep working on something else; it's not my fifteen minutes being taken up. Also, because today's update is so meager, I thought I'd show off some of the rigging that I did for the model. Here's the arm moving about; it's nothing special, just a range of motion test. trexarm.mov Carl
-
Thanks for the positive feedback about the model, and for the kind words about my site, Rodney and Nancy. Rodney, one of the sources that I've been using is the Black Hills Institute site - they have a number of amazing replicas for sale, including a full T rex (for the modest price of $100K). They sell 2 different arms, one gracile and one robust. The gracile they attribute to a male and the robust to a female - the justification for which is that in most other animals, the females are larger. Of course, the most famous female rex is Sue, another amazing resource to have just a few miles down the road from me. robcat, I considered something vaguely similar inasmuch as I had played with duplicator, but I think your idea is better. There are definitely the big landmark vertebrae that can be modified in the way you suggest. My only hesitation would be that I've found that overloading a path constraint can cause serious performance hits during animation, but I think the happy medium might be "modeling" the vertebrae according to your scheme, then exporting the action or chor as a model. Either way, thanks for the great idea and I'll make sure to post about it when I get there! Carl
-
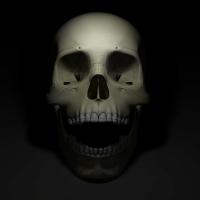
Hey everybody, It's time once again to post my latest work in progress, a T rex skeleton. For anyone who knows me (or even my handle), this won't come as the slightest bit of surprise. Several years ago, I completed a T rex skull, and I always wanted to complete the skeleton, especially since Joe Cosman's Albertasaur is such an amazing model and has long been a wonderful bit of inspiration. So here we go: The goal at this point is get as many pieces made and in place. I am going for fidelity to my source material, but not extreme levels of detail. This is obviously a subjective standard, so I apologize in advance for inconsistencies along the way. However, because of the nature of the model itself, I can and almost certainly will go back at various points along the way to modify, add or even rebuild the various pieces that are already here. I've already completed the arm and shoulder blade, six of seven parts of the pelvis, the femur, tibia and fibula. I've begun on the metatarsals, but it hasn't made it into the render, yet. I've actually already modeled a few of the vertebrae, but since there are so many (80, by my count) and each is a variation on its neighbor, they're going to require a special effort all their own. The model is currently a little under 12,000 patches, with just over a third of that being devoted to the skull. This image took about 15 minutes to render at 640x480, with one light, radiosity and 5 passes. Here's the render:
-
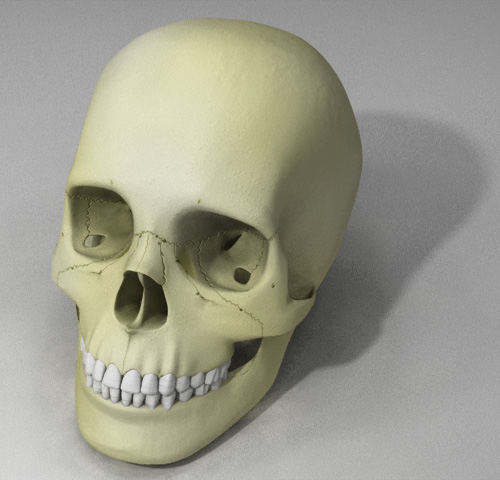
Thanks for the positive feedback, everyone. I've started adding texture to the skull: A material for the skull as a whole so I can add bumps and pits, and texture maps (though, right now there is only one, on the face) for the sutures. Here's what I got so far:

-
Great stuff, Robert! Did you animate the Rocket and string by hand or is that a dynamic constraint at work? Either way, it's a wonderful clip!
-
Fantastic work. What a treat the movie was, too.
-
Absolutely. I haven't started texturing it yet for two reasons: 1) as I add detail, I add, remove and reshape the geometry and 2) I'm still only working on the right half, then copy-flip-attaching for a render check, both of which would necessitate a lot of reapplication of decals. However, maybe it's time I added them anyway, since the reapplication process is not terribly difficult and the inclusion of details like the skull sutures can only help. Thanks for the feedback! Carl
-
Finally got a chance to start in on the jaw. Here's what we got so far: Carl

-
Thanks for the tip, Matt - I'll give that a try when I create another set of renders. I saw your post too late for this one, though, so it still contains some radiosity artifacts. I think, at least for now, that I prefer the radiosity render to the AO, so your tip is very timely! Nancy, I don't yet have anything in particular in mind for a final image of the skull. I want only to model a complete one. Once that's done, I'll be able to make a range of variations from freshly bleached to having sat exposed on a mountainside for a decade. Right now, the renders are only serving as a means of showing how far I've come with the model, and aren't yet an end onto themselves. Most obviously I've added a septum, but I've been working largely on the under side of the skull, so I added a few more renders to this post to show that work. I still want to add more detail there. After that, I'll start in on the jaw. Here's the latest batch. Each frame takes a little under 30 minutes to render, and the model has increased its patch count to about 2100. Carl


-
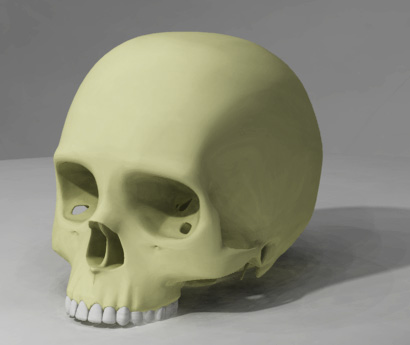
Thanks for the positive feedback, everyone! A special thanks to MJL for finding Eugene, though I still haven't been able to locate him on any of the CDs I have, though I haven't found all of those, either. Nancy, you're right of course, though I think more troubling is the buffing this person would have had done in order to get a cranium that smooth . I plan on getting to the texturing when I'm closer to finishing the model. I'm actually only working on the skull's right side and copy-flip-attaching it before I render (or when I want to make sure things are looking as I think they should). I know I'll eventually be drawing in a lot of bumps, sutures, pits and other details, but that's a process better left to a point when I have more of a finished model. John, holy crap! I can't believe that happened to you and that you had both the foresight as well as the stomach to give your split chin a good look while you had the chance. Yipes and wow all at the same time. When I move on to the mandible, I'll be looking to you to keep me on track, given your first hand experience. I reshaped the area just above the teeth for this render and went back to a radiosity lighting scheme. Carl

-
Here is another update of the model. I've reshaped the cheek bones, and added 2 (mostly hidden from this vantage point) structures. I think my next step will be adding a little more texture. I removed the bone color from the teeth and just left them a pure white in this render. I also replaced the radiosity render with an AO for fun. I'm not sure which lighting scheme I like better. BTW, am I just misremembering or was there really skeleton AM model named Eugene? Carl

-
I need some help with rendering
dinocarl replied to jason1025's topic in Work In Progress / Sweatbox
Jason, If you still haven't consolidated the file, I recommend doing that. I've consolidated many over the years and here's how it works: Save your file as a Project. This is may be the simplest and most obvious step, but needs stating in case you've only saved out Materials, Models, Choreographies, etc as their own files. Go to Project->Consolidate Project. AM will ask you to confirm with "Do you really want to copy all project data into a new diretory structure? It is recommended that you create a new directory for the destination of this operation." Create a new directory per the recommendation. I usually give it a name like "ConsolProjectName" so I know later that contained in it is a consolidated project. Open that Directory and save the project file there. It can have the same name as your original project. When you then open that directory in a file browser, you'll see that AM has created a new set of directories that duplicates the file paths for all your saved files, and within them created duplicate versions of all those same files. Here's an example: I keep all my content on a separate partition and at the root of that I have Actions, Choreographies, Materials, Models, Projects and Textures directories. When I consolidate a project, I'll save it in my Projects directory. When I then go to the Projects directory, I'll see my newly created "ConsolProjectName" directory. When I open that, I see a single directory named after the drive letter with a dash afterwards, e.g. "F-". Opening that I then see all the directories I've listed above. And when I open that Projects directory, I'll see the name that I gave the Project, in this case "ProjectName". Similarly, if you create files on multiple partitions, all those will also be given their own directory with the same drive letter as they're assigned by your machine and then put into the "ConsolProjectName" directory. It's been a while since I've done this on a Mac, but I'm pretty confident that this is all the same, except the consolidation there uses drive names, since there are no drive letters on Macs. If you make any changes to your original Project or any saved files that are associated to it, they won't be reflected in the consolidated Project since it created duplicates of all those files at a certain point in time. However, you can open those consolidated files and continue to work in them just like any other AM file. It may seem like this is a lot of extra file creation for something that could be mimicked simply by embedding all your files into a Project and then saving that, but that is only true up to a point. AM can't embed image files or sounds (to the best of my knowledge) and so consolidating will make sure that any texture maps or sound files get copied as well. Hope this helps. Carl